Registering a domain in a new Hover account
1. Navigate to the Hover home page.
2. In the "Find your domain name" text box, enter the domain name you want to register or enter keywords for suggestions.
A list of available extensions and suggestions will appear. Domain names with a gold star next to them are premium domain names that have already been registered and are available for purchase from a private domain portfolio.

3. Click + Add to Cart to add the domain name to your shopping cart.

4. Click the Shopping Cart to proceed.

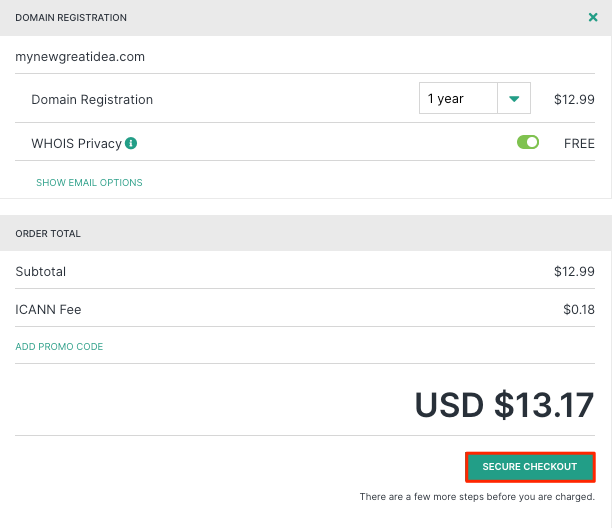
5. Click Secure Checkout to proceed to checkout.

Whois Privacy (where supported) is included with every domain registered with Hover for no extra charge. You can add email addresses for the domain by clicking on Show Email Options, mailboxes can be purchased and created after registration also.
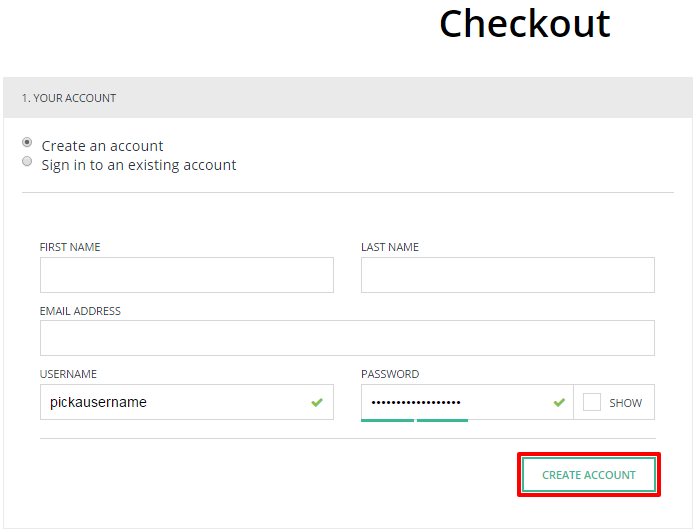
6. On the checkout page, select Create an account and enter your first and last name, email address, desired username, and password. Click the Create Account button to proceed.
Alternatively, if you already have a Hover account, select Sign in to an existing account then sign in with your username and password.

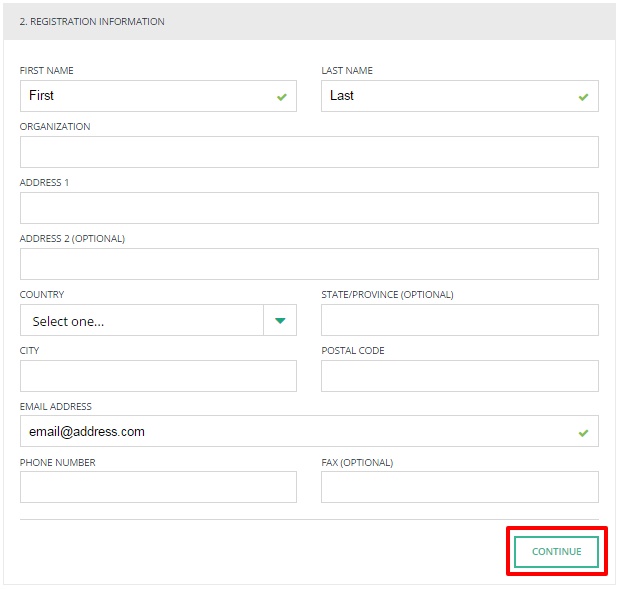
7. All registered domain names require a registration record. You can register the domain under the name of an individual or an organization. Your domain's registration record can be different from your billing information. Fill in the appropriate fields and click Continue.
Note: If you are not an organization, you can enter your first and last name in the Organization field. If you are registering this domain for an organization be sure the organization name is more than four (4) characters in length. Leaving the organization field empty will lead to registration problems.

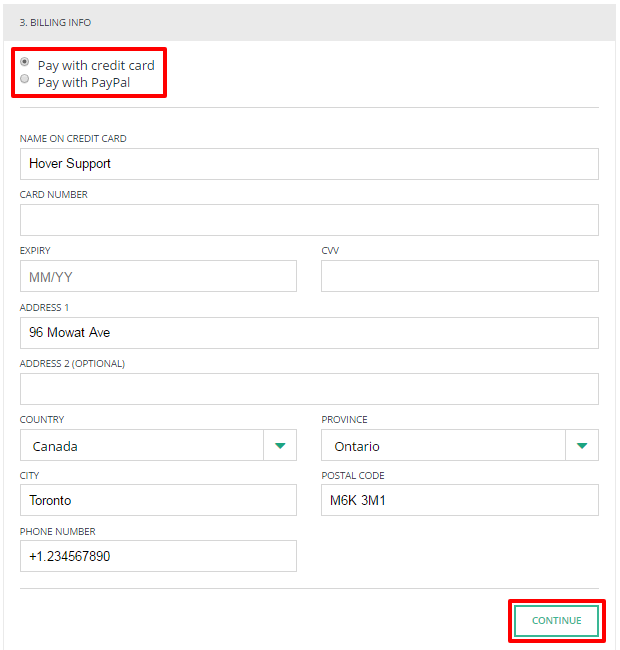
8. Select either Pay with credit card or Pay with PayPal as the way in which you want to save your billing information. If you select PayPal, a pop-up window appears asking you to log in to your PayPal account.
For help setting up PayPal, please see: How to: Use PayPal to purchase or renew Hover services
If you are paying by credit card, enter your credit card billing information, and then click Continue at the bottom of the page.

9. Click the box to put a checkmark next to "I have read and agree to the Terms of Service", and then click Submit Order.

An order confirmation is displayed. Your domain registration is now complete!
Registering a domain in an existing Hover account
1. Sign in to your Hover control panel using your chosen method of 2FA.

2. On the Hover home page, enter the domain name you want to register or enter keywords for suggestions.

3. Click + Add to Cart to add the desired domain to your shopping cart.

4. Click the Shopping Cart to proceed.

5. Click Secure Checkout to proceed to checkout.

6. Because you are already signed in, you will see your Domain Default information applied to the Registration Info, and the Billing Info on file will already be applied to your order. If you need to edit either piece of info, use the Edit options to the right.
Once this info is correct, click to put a checkmark next to I have read and agree to the Terms of Service, and then click Submit Order.
Your domain registration is now complete!
Was this article helpful? If not please submit a request here
How helpful was this article?
Thanks for your feedback!


